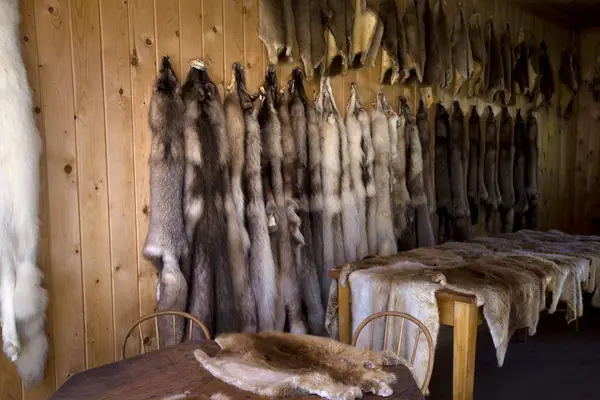
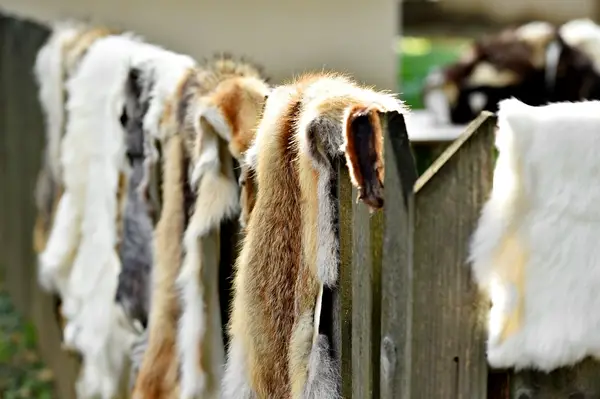
A fur pelt is no trivial thing to be in possession of, especially if it’s from a coyote.
Whether you’ve got a pelt from hunting, from trapping, as a gift, or even if you’ve found a roadkill coyote, there are plenty of creative things to do with a coyote pelt.
Here are 5 cool things to make with a coyote pelt.
Table of Contents
- Coyote Fur Trim For a Winter Coat
- Coyote Fur Hat
- Coyote Pelt Blanket
- Coyote Fur Bracelet
- Coyote Fur Leg Warmers
- Conclusion
Coyote Fur Trim For a Winter Coat
The stiff fur of a coyote makes it an ideal choice as a trim for parkas and coats. It was the fur typically used on Canada Goose jackets before the brand discontinued its fur usage.

Lined along the hood of a jacket, the fur helps keep your face warm and bumps up the value of any coat.
If you need some extra guidance with preparing your pelts, institutions such as the New Mexico State University offer great resources!
Here’s how you can add coyote fur to a jacket you already own!
What You Will Need:
- Coyote pelt (or 3 coyote tails)
- Waxed thread for leather working
- Leather needle, sewing awl, or sewing machine
- Winter coat
Steps
- Cut a long rectangular piece from the middle of the pelt, about 3 inches wide. Cut through the skin, but don’t cut the fur.
- Adjust the length of the piece according to the circumference of the hood that you want to add the trim to.
- Fold the rectangle in half widthwise so that you have a long skinny rectangle with the fur facing inwards. Sew the folded ends of the rectangle so that the fold stays put.
- Flip the piece inside out so that the fur is outwards; the sewed ends will form smooth, rounded corners.
- Carefully cut open the seam of the hood on your chosen coat. With the pelt piece folded so that only fur is showing, place the two long edges in the seam (in between the two fabric pieces of the hood).
- Sew the seam shut with the fur piece in it, starting from the middle.
Alternatively, you can use 3 coyote tails to make a more fluffy, round trim. You will have to attach them to snap tape or a piece of fabric to then sew onto the coat hood.
Can You Make a Detachable Fur Trim?
Yes – a detachable fur trim is very handy since you can’t put fur in the wash without ruining it. By sewing buttons or a zipper to both the fur trim and the coat, you can easily make it removable.
Coyote Fur Hat
Styled like a classic trapper hat, this will keep your ears nice and warm on winter trips. The natural light brown color also blends in well with the woods if you’re going hunting.
What You Will Need:
- 1 coyote pelt
- Measuring tape
- Waxed thread for leather working
- Leather needle or sewing awl
- Exacto knife or another sharp knife
- Cardstock or paper to use as patterns
- Felt lining for the inside
Steps
- Cut out 5 shapes from the coyote pelt. To make this easier, you can cut out the shapes from cardstock first, then trace them onto the pelt:
- Two 8.5 x 4.5-inch rectangles (front piece and rear piece)
- Two 8.5 x 4.75-inch rectangles that are curved at one end (ear flaps)
- One 7-8 inch diameter circle, depending on the head circumference (top piece)
- Sew both ear flaps to either side of the front piece. This requires a needle made to punch through leather, and thick waxed thread.
- Sew the rear piece to the other ends of the ear flaps, so that you now have a full circle.
- Place the top circular piece on this circle and attach it all together with clips, with the skin facing outwards. Since you have to sew the skins together, you will be making the hat inside out.
- Sew all the pieces together, making sure no fur is slipping through the cracks and getting sewn into the seams.
- Line the skins with soft felt and sew it on. This will be the inner layer of the hat.
- Flip it inside out and enjoy your hat!
Can You Make a Hat With Fox Fur?

Yes! The red-orange color of fox fur gives this hat a majestic look.
Since foxes are smaller than coyotes, you may need to use two pelts to have enough material to make the full hat.
Coyote Pelt Blanket
If you have several coyote pelts you’re looking to use up, and you want something extra warm, then this blanket is a worthy project.
This video from Youtube shows a finished coyote blanket and talks you through the creation and customization process.
This is a more ambitious craft because of the size and length of time needed, but the final product may become the most valued thing in your home.
What You Will Need:
- 9 to 12 coyote hides (to make a 7 to a 10-foot-long blanket)
- Sewing machine or sewing awl
- Waxed thread for leather working
- Sharp knife
Steps
- Cut the skin of the pelts behind the ears and above the tail to remove the face and tail.
- Cut the remainder of the pelts into same-sized rectangles – make the rectangles as large as possible to maximize the blanket size.
- Arrange the pelts together, fur-side down, into the shape you want your blanket to be, and hold them together with clips while you sew them together.
- With either a sewing machine or sewing awl, stitch the pelts together. Because of the number of pelts and the thickness of the skin, this is tedious work.
Coyote Fur Bracelet
This is a simpler project, great if you don’t have much time on your hands and want something easy to start with. These furry bracelets or cuffs still make for special gifts.
What You Will Need:
- 1 coyote pelt (or just part of one)
- Sharp knife
- Large button
- Thread and needle
- Measuring tape
Steps
- Measure the circumference of your wrist. Carefully cut a rectangle from the coyote pelt that is 2-3 inches wide that is a few inches longer than your wrist circumference.
- Wrap the rectangle around your wrist, overlapping the ends by two inches. Cut away some length if the rectangle is too long.
- Sew the button onto one of the ends where they overlap (the end that is underneath the other one).
- Carefully cut a small slit on the other end, lined up with where the button is, so that the ends can be buttoned together. You now have a fur bracelet/cuff.
Get Creative With the Design
Feel free to play around with the color by dyeing the fur.
Apply bleach to the fur for 40 minutes, then apply a hair dye of your choice. If you choose a dark color like black you can skip the bleaching step altogether.
Coyote Fur Leg Warmers
Leg warmers are an adaptable accessory: they can fit the style of a modern fashion model, or add a rustic Viking look to a hunter’s outfit.
With these leg warmers made of coyote fur, your legs are sure to be warm whether you’re wandering city streets or out in the bush on a snowy day.
What You Will Need:
- Coyote pelt
- Sharp knife
- Thick waxed thread or thin rope to use as a ‘shoelace’
Steps
- Cut the coyote pelt into as large a rectangle as possible (if the pelt is small and your legs are big, you may need two pelts).
- Cut that rectangle in half widthwise so that you have two rectangles measuring around 12 x 14 inches.
- Wrap one of the rectangles around your calf to make sure it’s the right width and desired length. Remember that these are meant to go over thick pants, so make them larger than a regular pant leg.
- Carefully cut small holes along both edges that meet when wrapped around the leg. Space the holes out by 3 inches. They should just be large enough to fit the thread or rope through.
- Feed both ends of the thread into the two holes at the bottom of both edges.
- Cross the ends of the thread over themselves along the fur, just like you would a shoelace, and feed them through the next holes up.
- Continue crossing the thread ends and feeding them through the holes until they reach the top of the leg wrap. At this point, tie the ends together in a loose knot.
- When you are ready to wear the leg warmers, untie the knot and pull them over your shins. You can then tighten them as you like and tie the thread in a bowknot at the back of your upper calf to keep it secure.
Conclusion
In the end, a coyote pelt is a valuable item. With a bit of creativity and basic sewing skills, you can make it even more special.
Hopefully, these projects sparked some ideas for what you can do with a coyote pelt!


